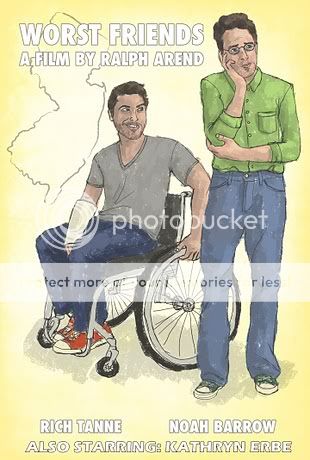
Yeah, we'll get (maybe, cross my fingers and hope the best) at May 1st the kick-off of Criminal Intent season 10. I can't wait to see the promo pictures and hear about the filming. I saw the two posts at VINNIE VIDI VICI and TheReel. I only need the official certification to add it in my Kathryn 2011 list ;o)
For the waiting time, here my second tutorial.
For the waiting time, here my second tutorial.

I use Photoshop CS3 and I thank cath from caths_arts for her translation list.
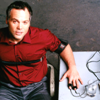
For a challenge I made this Criminal Intent icon of Bobby and Alex – Scared Crazy. Thanks for second place.
Step One:
Take your cap, crop the part you want to include in the icon and do everything else like sharpening or lightening. [In the most cases I add a new fill layer in white and set it to soft light. Then I duplicate the base and set it in soft light on top. Merge all three layers together and sharpen it.]

Step Two:
Brightness/Contrast: new layer --> New Adjustment Layer --> Brightness/Contrast: Brightness +20
Step Three:
Hue/Saturation: new layer --> New Adjustment Layer --> Hue/Saturation: Saturation +30

These two steps are optional and you should modify the settings according to your icon. I don’t play often with the Hue/Saturation adjustment but this time I liked the little more golden touch I could create at the light parts (coats, hair) of my icon.
Step Four:
To let Bobby and Alex glow a little bit, add a new layer and set it to soft light. Take a small soft brush (size 12) in white. Draw the outline of both and also add white at the light parts of your icon. To reduce the effect a little take the eraser tool (opacity 30%, size 60).

Step Five:
Open this texture by meathiel and set it to lighten. I really like the shiny yellow at the left down corner, but a few dots are too strong for my taste. I used again the eraser tool (opacity 30%, size 60) and dapped over the big dots.

Step Six:
Duplicate your base layer and desaturate it. Set the layer to soft light and opacity 50%. Move it on top of your layer stack.

Step Seven:
Last point: Move the layer of step four (the white outline glow) on top of your stack. Ready!

Good Luck and I would love to see your results. Please credit when using my tutorials.
P.S. I found the souce of my first tutorial, the Maggie banner. Here one cinema.
For a challenge I made this Criminal Intent icon of Bobby and Alex – Scared Crazy. Thanks for second place.
Step One:
Take your cap, crop the part you want to include in the icon and do everything else like sharpening or lightening. [In the most cases I add a new fill layer in white and set it to soft light. Then I duplicate the base and set it in soft light on top. Merge all three layers together and sharpen it.]
Step Two:
Brightness/Contrast: new layer --> New Adjustment Layer --> Brightness/Contrast: Brightness +20
Step Three:
Hue/Saturation: new layer --> New Adjustment Layer --> Hue/Saturation: Saturation +30
These two steps are optional and you should modify the settings according to your icon. I don’t play often with the Hue/Saturation adjustment but this time I liked the little more golden touch I could create at the light parts (coats, hair) of my icon.
Step Four:
To let Bobby and Alex glow a little bit, add a new layer and set it to soft light. Take a small soft brush (size 12) in white. Draw the outline of both and also add white at the light parts of your icon. To reduce the effect a little take the eraser tool (opacity 30%, size 60).
Step Five:
Open this texture by meathiel and set it to lighten. I really like the shiny yellow at the left down corner, but a few dots are too strong for my taste. I used again the eraser tool (opacity 30%, size 60) and dapped over the big dots.
Step Six:
Duplicate your base layer and desaturate it. Set the layer to soft light and opacity 50%. Move it on top of your layer stack.
Step Seven:
Last point: Move the layer of step four (the white outline glow) on top of your stack. Ready!
Good Luck and I would love to see your results. Please credit
P.S. I found the souce of my first tutorial, the Maggie banner. Here one cinema.


No comments:
Post a Comment